So with the Premiere being a little under a month away, I thought it would be cool to post the postcard that we will be sending out to let people know how to see the film! As you know the top image is from Celestial and the bottom one is from Yours, Mime, and Ours. If you're in the Orlando area, make sure you come to the CEM on April 21st!
Enjoy!
~Josh
Monday, March 31, 2014
Sunday, March 30, 2014
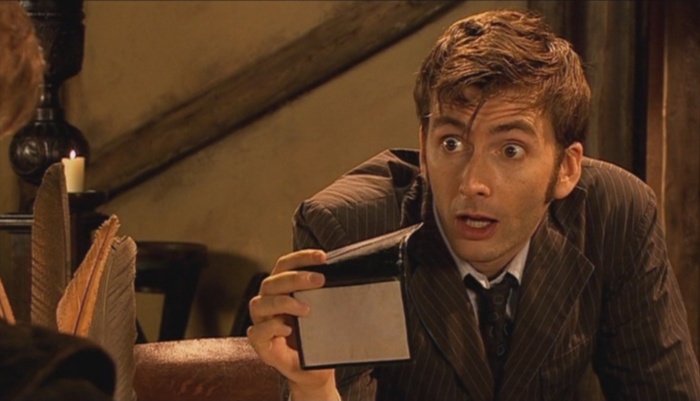
Prop Making - Psychic Paper
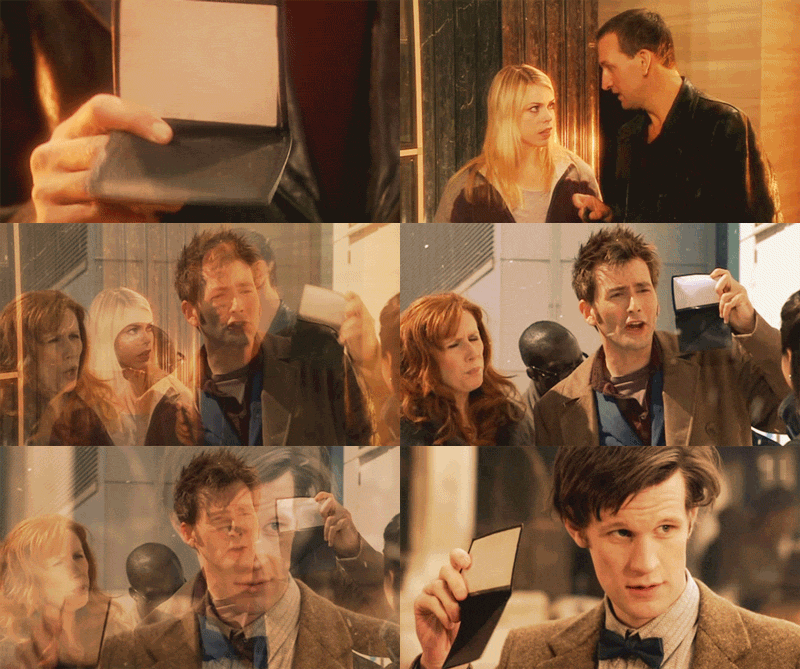
So one thing that has always fascinated me has been prop making. Its a hobby I've always wanted to pick up, but just never seemed to have time. Recently I decided to make some Psychic Paper from the show Doctor Who. For those of you who don't watch Doctor Who, Psychic Paper is used to trick people into thinking you are someone you are not. Think like a fake ID that will tell the person looking at it someone super important every time. I figured that since I'm still relatively new to prop making, I should start off with something simple.
To begin I went to my local crafts store and purchased some supplies. I picked up two sheets of leather and some scrapbooking dividers. I needed these because I wanted my psychic paper to have a pocket where I could write things and slide them into place of the normally blank paper. I also used glue, tape, a box cutter, scissors, and a microwave pizza box for this build. Sadly I didn't think to photograph my process, so instead I'll just explain what I did below.
The first step was to measure out the leather and cut it to size. My psychic paper is around 5 inches by 7.5 inches, which I found looked to be the correct size. After cutting two pieces of leather that size, I also cut some cardboard from the pizza box to give the build strength. I put the cardboard between the two pieces and glued all of them together. The next step was to fold the leather wallet in half and place it between a huge stack of books, so that it would fold open. After the glue dried and the wallet had a crease in it, I took some of my remaining leather to cut a small triangle out to use as a pocket. I then glued two of the three edges to the wallet and let it dry. The final step was to take the scrapbooking paper and dividers and create a small plastic sleeve the same size as my paper. I then taped the edges of the sleeve to the back of the paper and glued the paper to the wallet. Once it dried I was done! Now the prop isn't perfect. I plan on buying some black thread and a leather needle and sewing the border of the wallet to both give it strength and add to the look, but thats a task for another day. The last thing I added to wallet was a small key that I got for free at my local hardware store. It was a mis-cut key, so they just gave it to me. I chose it because it was relatively similar to the Tardis key used in the show.
Below are some pictures of the actual Psychic paper used by the Doctor.
And finally here is my prop!
For one of my first prop builds, I'm rather proud of it! I know it's not perfect or canon by any means, but I think I did a pretty good job considering I figured this out without any tutorials or templates.
As always I hope you enjoyed!
~Josh
~Josh
Wednesday, March 19, 2014
Celestial Animation Preview
Hey guys! So I've posted a lot of Celestial things lately, but I haven't posted any of my animations. Now I don't want to give too much of the film away, so I'm just going to show you one shot I worked on. One thing that I've found while working on the film, is that I'm quite good at animating facial reactions. Several of the key reaction shots in the film were ones I animated, or asked to touch up. I thought it would be cool to show one of those shots now!
Hopefully you liked this shot! I can't wait til the movie is finally finished. You can be sure I will keep you all up to date.
As always enjoy!
~Josh
Hopefully you liked this shot! I can't wait til the movie is finally finished. You can be sure I will keep you all up to date.
As always enjoy!
~Josh
Thursday, March 13, 2014
EVERYDAY I'M RENDERING!
So as you can tell from my last two blog posts, we have begun the long and tedious process of rendering and compositing. As our teams Compositor I've been taking all of the render given to me and turning them into the finished shots for the film. Because of this I thought it might be cool if I gave you a sneak peek of what I've been doing before we release a trailer for the film. If you remember a few posts back, I posted a matte painting I did for the film. Here is that shot from the film. Now keep in mind that this render is only partially done, I'm still waiting on another few elements to really make this shot as amazing as we want it. That being said I thought it might be cool to see all of these pieces I've been teasing you with together!
Well I hope you liked that! I should have a trailer done soon, so I will make sure to post that the moment it's done.
As always thanks for stopping by. Enjoy!
~Josh
Well I hope you liked that! I should have a trailer done soon, so I will make sure to post that the moment it's done.
As always thanks for stopping by. Enjoy!
~Josh
Subscribe to:
Comments (Atom)


